Pages

Friday, November 29, 2013

Outerwear Round up


Well, though it is still fall in the northern hemisphere, we had a significant spurt of winter weather this week.  I hope you all had a wonderful Thanksgiving and that your travel was not too stressful with the storms that just crossed the US.

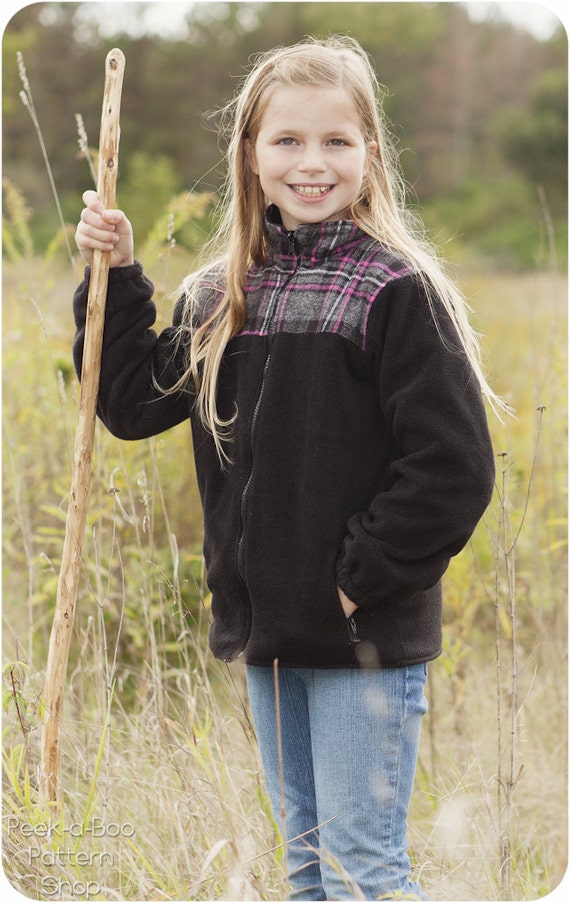
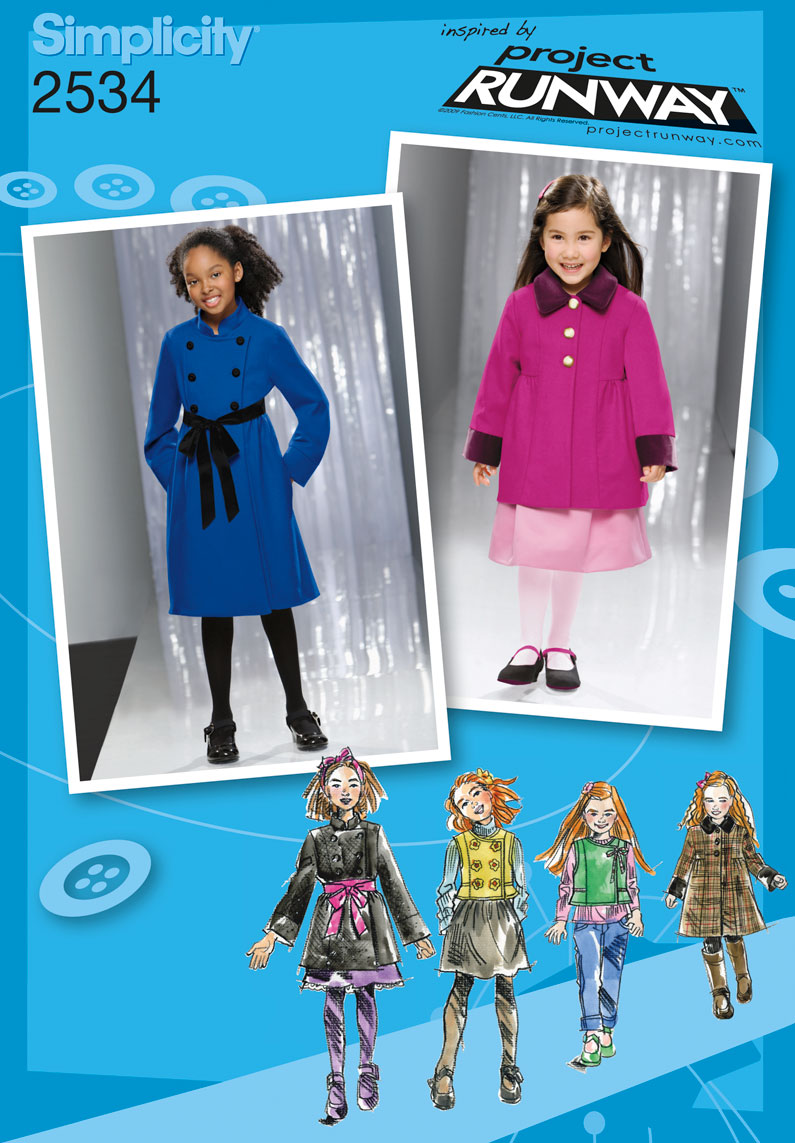
All that snow got me thinking, do you sew your tween coats?  I have sewn several jackets, but for weather below freezing, I always just purchase rtw.  There are actually several coats on the market that would be lovely in either boiled wool or high tech fabrics.  Below are a few that I thought would be especially versitile.

kwik sew coat
Alpine Wonderland
Happy Camper
S2534
So, let us know... Do you make coats?  Where do you buy your outer wear fabric? 


Monday, November 25, 2013

Mission: Secret Squirrel and a Pattern Review Thrown In

 Have you heard about Secret Squirrel? Well if not, go check out what he is all about.  Basically, he's a world traveler who gets to visit various lucky bloggers and give out secret missions(5 acorns). Sounds kind of fun right? Well being the geography buff that I am and loving a good challenge to tie things together, I've been meaning to sew along for the past couple of months. But as always, life happens and my ideas never quite make it out of my head.  
This month however was different, because each of the things I envisioned were things I already had plans to make. Convenient, nah(that would be German for 'Right"...it's getting late here and I'm a little loopy)?
First up let me tell you the "Acorns":
Those would be 1. Where the Wild Things Are, 2. Blue, 3. David Bowie, 4. Pockets and 5. Great Britain.
Now on to my creations...you probably can't see them all that well in the lousy photos, but it was dark and I haven't figured out the camera's flash. While it doesn't do the outfit justice, I think the yellow glow effect looks kind of cool.
Here they are:
1. Furry vest
2. Blue button on the pants and a blue zipper as well(I only had a navy blue 4" zipper so this was by default)
3. Ruffly white shirt...think of the movie Labyrinth. That's the first thing that came to mind when I thought of David Bowie.
4. Pockets on the pants with...
5. A British flag sewn on to them.
And here's the cool thing, the pants I had already lined up to review, the vest was from the dress pattern that I just reviewed and I promised to make Sophia a furry one from it and the white shirt she needed for an upcoming chorus concert. The only thing I really had to think about was how to add Great Britain and on the black stretch denim I think the flag looks totally trendy.
So how did I do with Secret Squirrel's mission?
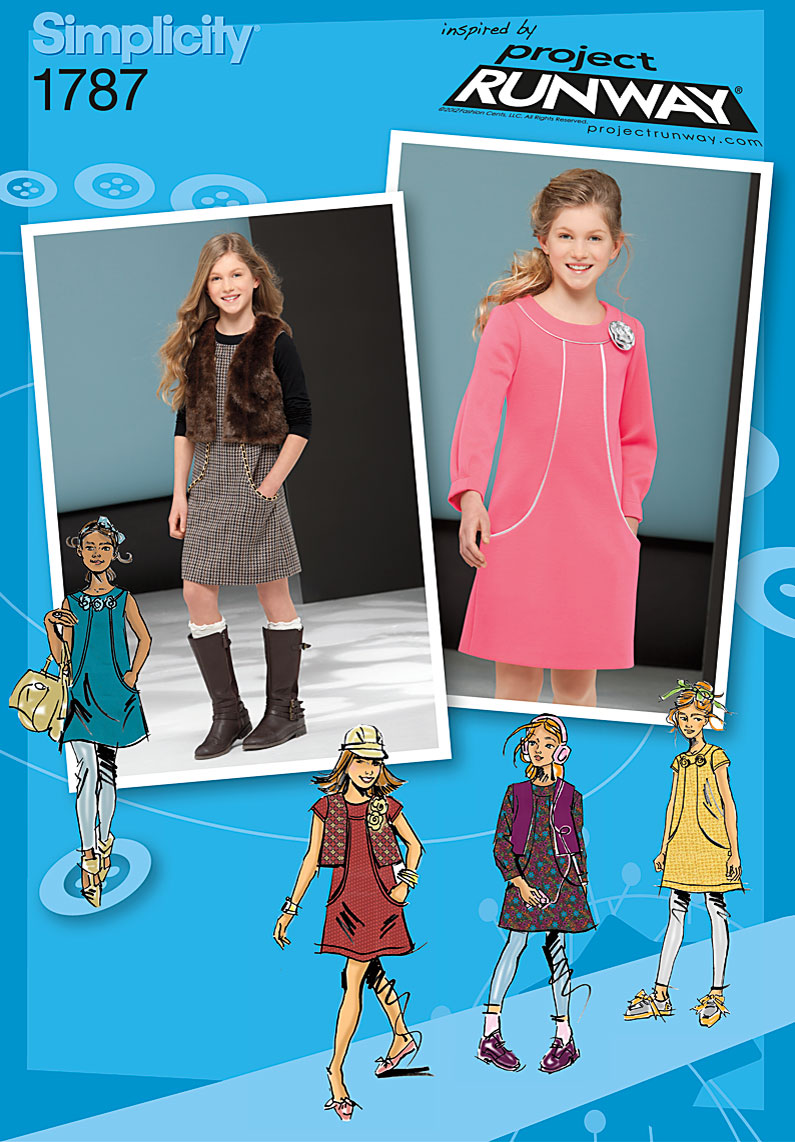
 The shirt is a completely made up pattern and the ruffles were made from circles. I'm trying to decide if the vest even warrants a review...it was so easy and simple. I used the vest pattern from Simplicity 1787.
As for the pants (you can see the blue in the button) here's the run down:
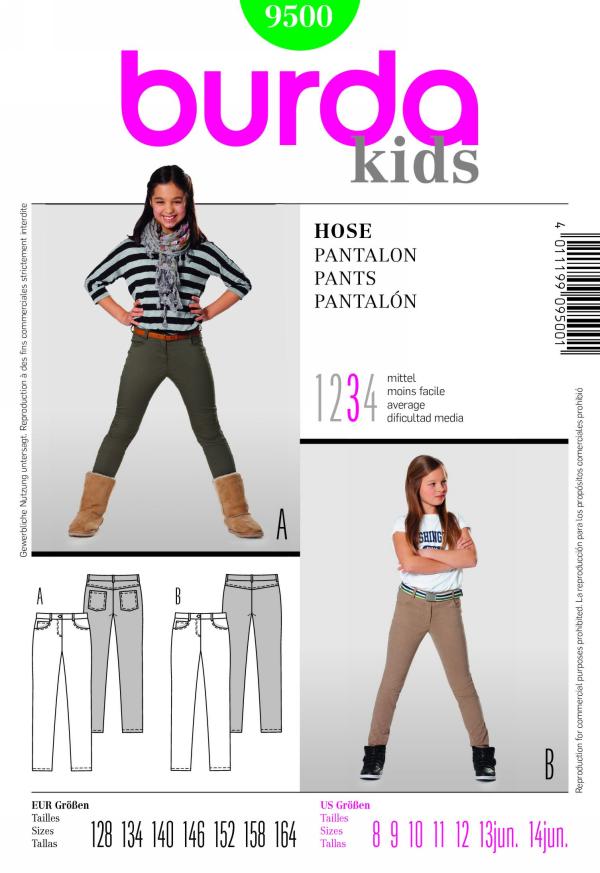
Pattern: Burda kids 9500
Again, it's one I picked up at JoAnn's a little while back because Sophia wanted some skinny jeans. It comes in sizes 8, 9, 10, 11, 12, 13jun and 14jun. I'm assuming the 'jun' means junior and I'm not sure how that changes the sizing by adding that. I sewed them up in a size 10. 
Special Materials: You'll need a 4" zipper, button and some interfacing and the fabric called for is stretch blend fabrics. I used a stretch blend denim with some spandex in it. It was a dream to sew with...stretchy like a knit but sewed like denim.
Skill level: I would say intermediate. Burda is not heavy on the pictures or explanations when it comes to their directions. I think they assume you know a lot going into a pattern like this. That being said, I think you could figure this one out even if you've never sewn a zipper fly before.
I pretty much stuck to the pattern...until I realized it was not fitting well. Which leads me to the good, bad and ugly.
Good: A great classic of a pattern with a great skinny jean look.
Bad: My legs were kind of wonky looking and were twisting around...probably my fault, but I've noticed that some of my store bought skinny jeans do this, so maybe it's a skinny jeans problem. Any thoughts? Also a bad, Burda has you basting EVERYTHING before practically each step...I skipped this a lot.
Ugly: The rise is really too low in the back and the rear end didn't fit quite right. I ended up taking the back seam in by another inch to help it fit better. If I were to make this again, which I will despite this all, I will add a couple of inches to either the back yoke or back leg pieces to bring the back up a little bit and I will take off some from the width.
 Overall I'll give it and 1/2. I gave it the half because I think it is such a classic pattern and it really wasn't that hard to put together.


Wednesday, November 20, 2013

Linky Party Wrap Up

It's that time of the month that we get to pick a couple from the linky party to highlight. Thank you all for linking up! It's always fun to see what others are making!
Here are the highlights for this month:
We only had one boys look, but what a great staple! It looks so comfortable and it's great that you 'customize' it a little. Thanks Cindy for linking up!
KCW: Day 2

And I (Sally) picked another comfy looking shirt for my girl's highlight. Again, just a comfy looking staple but so easy to make your daughter's own custom-made top. Thanks Tracy for sharing!


 I (Major Moma) picked the swimsuit from Wombat Hole Sewing.  I am always looking for cute and functional swimsuits for my daughter and this one certainly fit both criteria.


Thanks everyone for sharing these great projects.  With cute outfits like these being made, our tweens will be glad that their mom still sews for them.


Monday, November 18, 2013

Pattern Review for Simplicity 1787--A Dress

Do you ever have a pattern that you sew up and in the end think..."I get it now" and then want to sew it up right away again?  For me this is one of those patterns.  I really like the pattern, but I don't quite like the end results (some of that is my own fault) and know I can do better the second time around.
What is the pattern you ask?
The pattern is this one:
It's Simplicity 1787 from the Project Runway line.  If you haven't worked with a Project Runway pattern, think of them as the precursor to pdfs. They give you a lot of options and you pick and chose how you want your outfit to turn out. I've liked all of the Project Runway patterns I've used so far. The directions are a little more vague than regular patterns because they give you a little more free rein of how you want the outfit to turn out. 
Source and why I picked this pattern: You can buy this pattern on line or at box stores like JoAnn's. I picked mine up for a dollar when JoAnn's had their Simplicity patterns on sale. I picked it up because 
I liked the clean modern lines of the dress.
Size: It comes in sizes 8-16 with a separate plus size version of each of those sizes. For Sophia I cut out a size 10 and used the size 12 length (thinking the finished measurements seemed a little short) and she has room to grow into it for sure.  However, I don't think it looks that bad for being a little big...she doesn't look like she's swimming in it.
Special Materials: You'll need a 16" zipper
Skill level: I would say an advanced beginner with some pattern reading experience. It's not that the pattern is confusing, but you have to pick and chose which directions to follow according to what you are or are not adding to the basic pattern. They don't give you version A, B,C, etc, but more of a blank slate that you start with.
Did I deviate from the pattern: Yes, I added an exposed zipper instead of a regular one and I didn't finish the arm hole seams with bias tape as called for, but rather finished the edge and folded it under. Everything else was following the pattern.
The Good: A relatively fast sew with not too many pattern pieces or complex instructions. I also like the clean lines of the dress and learned a different way of assembling things to achieve this look with the pockets. The other nice thing is that you can use a wide variety of fabrics for this dress, from light weights, to suiting, to corduroy, to wool blends. Definitely a versatile pattern when it comes to seasons.
The Bad: Runs a little larger than stated, but not too far off that it looks bad.
The Ugly: This is more my fault (have you notice the uglies always are?), but the "mock" piping does not work well with anything bulky. I used some left over maroon velvet I had, just because I liked the contrast, but it was too bulky and was hard to work with on the curves and on the back seam where you add the zipper. I think the pattern should have mentioned what materials to use for the "mock" piping. I think this is the reason why the front yoke looks a little funky...and the reason why I want to give this one another go, but use different fabric this time around.
I give this pattern and 1/2, but I might change that once I sew it up again...I'll keep you posted.


Friday, November 15, 2013

Sizing up a Pattern

Don't forget to link up what you have been sewing for your tween!
Go HERE to link up.
~~~~~~~~~~~~~~~~~~~~~~~~~~~~~~~~~~~~~~~~~~~~~~~~~~~~~~~~~~~
Do you have a favorite pattern that only goes up to size 8 (or even smaller:), but your tween still loves it and wants you to make more?  Fear not, it is still possible! You just have to get out your trusty tape measure and ask your tween to stand still for a couple of minutes and dust off some math skills.
The trick is getting some accurate measurements and then adjusting the pattern accordingly.

DISCLAIMER: I tend to use pretty basic patterns, so my experience is with those. I have not tried this on any pattern that is super detailed or intricate, so I'm not sure how this would translate over to that kind of pattern.

Measurements Needed
(You might as well get them all, while you have them standing still, but you might only need a couple of these depending on what you are sewing):
Chest--Take the tape measure all the way around just under the armpits...as girls start to develop this measurement becomes more important to check regularly (each time before you start a new outfit is what I would do) and make note of the difference between the chest and the bust measurement. One other thing I do is break this down to front chest and back chest.
Neck to Waist (Torso)--Take the tape measure and start collar bone height (I know the collar bone is in the front, but imagine it was at the same level in the back) and go down to the waist
Waist--Take the tape measure all the way around just a little above the belly button, but below the rib cage
Arm Length--Take the tape measure from the top of the shoulder down to the wrist (adjust for shorter sleeves)
Arm Circumference--Take the tape measure all the way around the biggest part of the bicep
Hip--Measure all the way around the biggest part of the hips
Leg length--Measure from the waist down to ankle (adjust for shorts and skirts)
Inseam--Measure from the crotch down to the ankle (adjust for shorts and skirts)
Thigh circumference--Measure the biggest part of the thigh
Height--Always good to know total height as well as shoulders to ankle

My Example
Here is a small (size 2T) version of my favorite pattern (McCall's 3417--but it's out of print)
 And here is the same pattern made to fit my then 9 year old daughter.

Once you have all of the measurements you can change a pattern.  If there aren't too many differences or the changes aren't too complex, I just add them in as I'm cutting.  If this is something I want to have again or it's a little complicated, I trace out a new pattern piece.
First thing you need to do is compare measurements.  
For example, lets start with a bodice. This goes up to 4T, but the bottom between the triangles is gathered as well as the top part being a casing for elastic. That means it's not "true" to size when it comes to measurements, so just take that into account when you think about adding more. And not only do you need add more width, but height as well. And when it comes to the height, you just can't add it on to the bottom, because you have to take into account the arm hole cut there on the side. I just visualized cutting the pattern in half horizontally and added a couple of inches there as well as a couple on to the bottom.
With me so far?
Now the trick is when you alter one piece, you need to think how it is going to effect the other pieces. That armhole you just bigger on the bodice needs to match up to the armhole on the sleeve, which needs to correspond to the other side of the sleeve and consequently the back piece. I just use the bodice piece as a 'pattern to get the armhole cut, so that they match. 
And as for the sleeve, I make them a little wider, adding inches in the middle and longer, just adding inches to the bottom as well.
For the back piece I actually fold it in half when I cut it because it is symmetrical and that makes it easier to add inches. After I match the armhole cuts with the ones from the sleeve, I add the necessary inches on the fold in the middle. Then I add the length desired.
Finally, for the skirt piece that gets attached to the bodice, I again fold the pattern piece in half and add the inches on the fold of the fabric. Then I match the length taking into account the bodice + the skirt=the back piece. 

There you have it...a somewhat simple explanation of how to size up a pattern.
Pictures will be coming of the actual process.

Wednesday, November 13, 2013

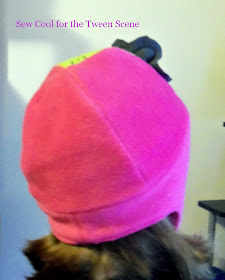
Pattern Review: Snow Day Hat and Mittens

I (Major Moma) currently live in Anchorage, Alaska and so when I had the opportunity in September to test Peek a Boo Pattern's Snow Day Mittens and Hat I quickly volunteered.  I made them up for all my children and was quite pleased with the pattern.  And, late in September we had our first snow.  My kids tested out the Snow Day mittens and hat and gave them their approval.  But then, it warmed up and have had no snow since.  I am told this is quite unusual for Anchorage.

But, this was the view outside my window on Monday, 11 November.  So, I figure this review should finally be posted.  I used pictures that I took shortly after sewing them, so I don't have pictures of the hats and mittens in action.  You will just have to trust me on that one.

Peek a Boo Pattern's Snow Day


This pattern can be purchased at Peek a Boo Pattern's website. (affiliate link)  The pattern comes in sizes from infant to tween.  But as with all hats, choose the size according to your child's head measurements, not their age.


Peek a Boo Pattern's Snow Day

You will need fleece, a closure (snap or button) and elastic to complete the pattern.  The elastic is for the mittens.  I lined the hat in another layer of fleece, so if you want to do that, just add some to the yardage.  The lower portion of the hat already calls for a double layer, so you will not need a lot to line it fully.

The skill level required is really minimal.  This is a very practical beginner pattern and definitely something that I would use for a young person; maybe a tween, to use as a first project.

Peek a Boo Pattern's Snow Day

I choose the pattern because I was offered a chance to test it.  But I am always on the look out for a hat pattern as they are a fun accessory that you can usually finish in a sitting.

I did do a little bit, well maybe a lot, of embellishing on this hat.  I knew that my daughter would want some fun elements to dress it up a bit.  You of course can embellish to the taste of the wearer.

Peek a Boo Pattern's Snow Day
Good: The sizes were right on (I sewed up three for all my kiddos and they all were true to measurement) and it really has a practical design.  There is also an option to not have the ear flaps, so the pattern has some versatility.

Bad:  The price seemed a bit high at $7.95 for just a hat and mittens.  But, since it was such a well designed hat with a wide range of sizes, you could likely get your money's worth if you plan on sewing for more than one child.


I give this pattern an overall pattern rating of .  It is a practical pattern that is fitting for those looking to make winter accessories or someone looking for a great starter project.


(Update: Sew Cool now has a few affiliate links and Peek-a-boo Patterns is one of them.  We think Amy carries great patterns for tweens so we think the affiliate program is a good fit.)