

Ladies who have rediscovered sewing in order to provide stylish and well-fitting clothes for their children. As our kids are growing up, they are not yet physically ready or mature enough for adult clothes, and thus adult patterns. So we are in search of fun, functional, and fashionable pre-teen patterns to share with you. Our primary goal is to assist in making sewing for tweens a fun experience for the sewer and the model!
Friday, December 19, 2014
Monday, December 8, 2014
Esty Shop Round-up
I am always on the lookout for new
designers that make patterns for tween sizes and most of these I find
through blogs. But, I have noticed that there are a few pattern
designers that have stores on etsy.com.
I am a big fan of etsy and buy most of
my gifts from there. I love how it is all small independent
businesses. So, I thought it would be great to go on etsy and do a
search for children’s sewing patterns. Here are my favorites of
what I found:
Sally actually found this shop, Blaverry and sent me the link. We both really liked her style but most of the clothes are for girls. But this jacket could be easily made for a boy with the right fabric choices.
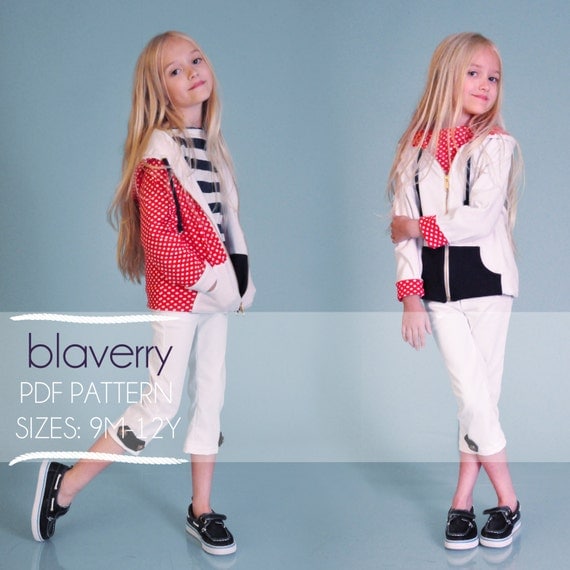 |
| Girls & Boys reversible jacket |
Livi Stitches Patterns is a pdf. pattern vendor that has a lot of ruffly cuteness that is more geared for younger girls. But, she does carry some patterns that are both sized and designed so that a tween could enjoy them. For example, here is a cute basic skirt with color blocking opportunities.
 |
| Lucy Skirt |
OK, this one only goes to size 10,
which is not a tween pattern. But the dress is so beautiful, I had
to share it. Maybe one of our readers can get some use out of it.
It is by My Childhood Treasures.
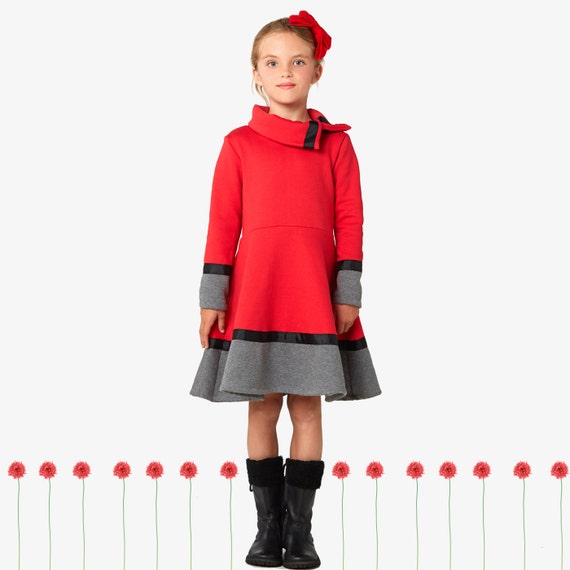 |
| Colorblock dress |
Felicity Patterns have modern style
patterns for both boys and girls. The sizes run up to size 12, so a
smaller tween can fit these. I like this shirt as an alternative to T-shirt for a boy but it is not so dressy as to make him feel constrained.
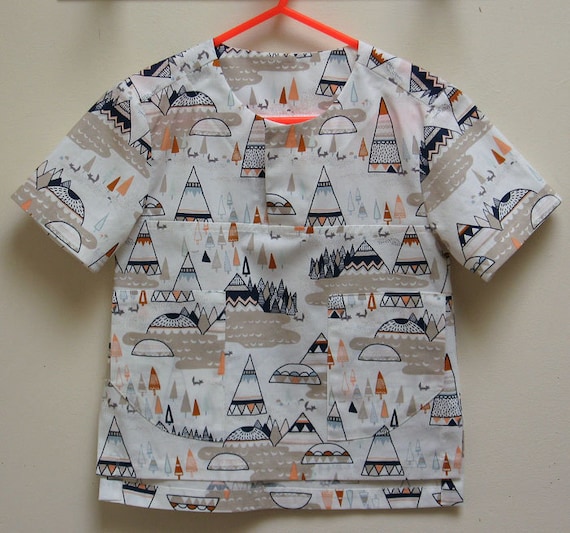 |
| Kiernan shirt |
The Scientific Seamstress has some
tween patterns too!
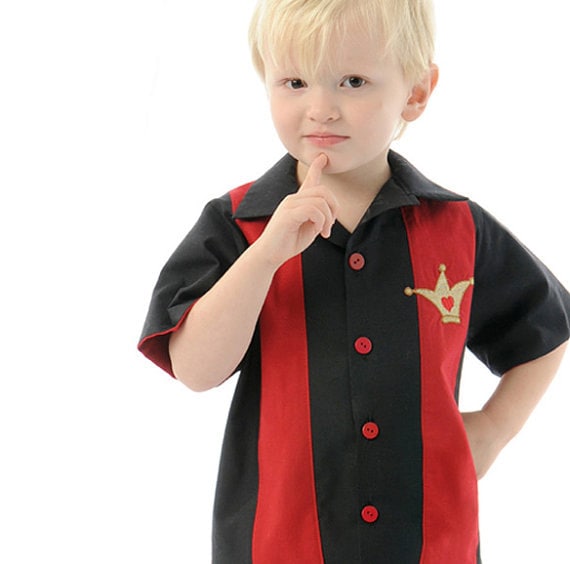 |
| Bowling shirt |
There is an etsy shop called Fishsticks Designs and this designer not only has a lot of tween patterns, she has a lot of BOY tween patterns. Many of them are great basics that you could use to make to fit your boy's unique or notso unique style.
For more of a modern, urban style, you may want to check out Heidi and Finn patterns. Here is her Urban Unisex Hoodie pattern.
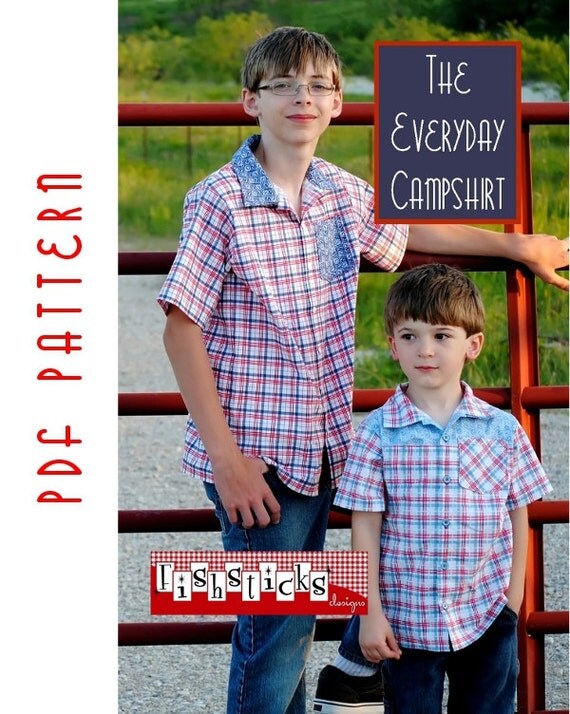 |
| Campshirt |
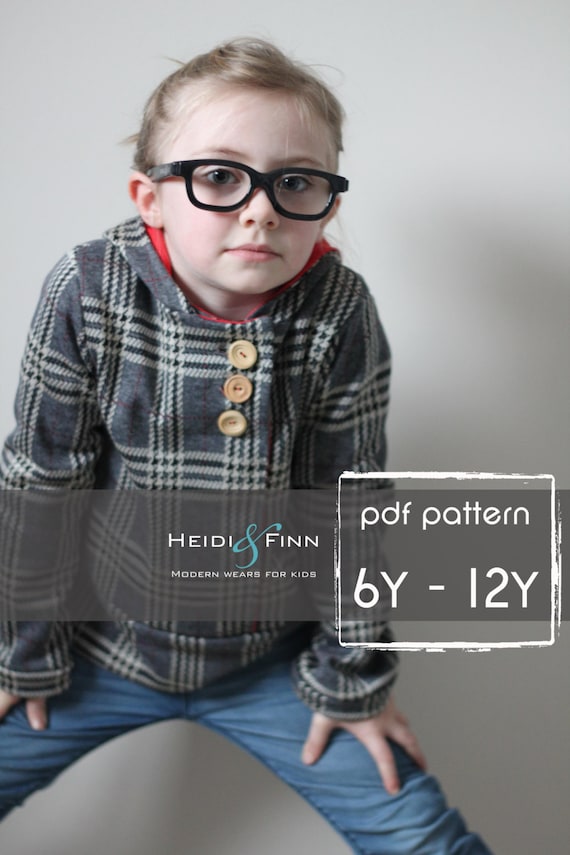 |
| Heidi &Finn |
What are your favorite etsy shops for patterns?
Monday, December 1, 2014
Dressing up a PJ pant
The first clothing item I ever sewed was in home-ec. Of course I was part of a generation that did not call it Home Economics; we called it Life Skills. In that class I learned some cooking skills, sewing, budgeting, and other miscellaneous things that everyone should learn before graduating high school. Do high schools still have classes like that?
Well, my sewing project was a pair of PJ pants. And it really is a great starting point for sewing clothes. The fit does not need to be exact. You have mostly straight lines, but do have to learn to navigate a couple gentle curves, and they are pretty practical. And heck, if you screw them up, you wear them at night and no one will see them.
Recently my daughter wanted some "pull-on pants" she did not want the hassle of a snap and zipper. I was totally flabbergasted as I have working so hard to perfect my fly techniques so I can make real jeans for her and not have her wear clothes that look like mom made them.
So, I decided to break out an easy pattern and make PJ pants, done fancy.

I asked her if a pair of slacks would work and she was a bit dubious, but conceded. I did not want her to look like she was actually wearing PJs to school.
I used some bottom weight fabric I picked up in the remanat bin. It was just over a yard and I loved the plaid. I had actually hoped to make myself something out of this fabric, but oh well, she needed pants more than I do.

I dressed them up a bit by using studs on the pockets and ice blue top stitching. Instead of making an elastic casing, as the pattern called for, I used wide pretty ice blue elastic that I zigzag stitched right on top of the fabric. The technique I used is one I learned for making circle skirts on the blog MADE This gave it a bit of a high-waisted look and I thought dressed them up more. I think with other modifications,dressed up PJ pants could be equally good for a boy.

Abi was not exactly thrilled with the high waisted look. But I promised her that with a long tunic, it would be just fine. She has just grown accustomed to a mid rise pant and so her first assumption was that I made them wrong.

I did make them a little long though, I wanted there to be room for growth. So many of her pants right now look like she is waiting for a flood, so I am glad that I added that length. Hopefully she can wear these through the winter.

Well, my sewing project was a pair of PJ pants. And it really is a great starting point for sewing clothes. The fit does not need to be exact. You have mostly straight lines, but do have to learn to navigate a couple gentle curves, and they are pretty practical. And heck, if you screw them up, you wear them at night and no one will see them.
Recently my daughter wanted some "pull-on pants" she did not want the hassle of a snap and zipper. I was totally flabbergasted as I have working so hard to perfect my fly techniques so I can make real jeans for her and not have her wear clothes that look like mom made them.
So, I decided to break out an easy pattern and make PJ pants, done fancy.
I asked her if a pair of slacks would work and she was a bit dubious, but conceded. I did not want her to look like she was actually wearing PJs to school.
I used some bottom weight fabric I picked up in the remanat bin. It was just over a yard and I loved the plaid. I had actually hoped to make myself something out of this fabric, but oh well, she needed pants more than I do.
I dressed them up a bit by using studs on the pockets and ice blue top stitching. Instead of making an elastic casing, as the pattern called for, I used wide pretty ice blue elastic that I zigzag stitched right on top of the fabric. The technique I used is one I learned for making circle skirts on the blog MADE This gave it a bit of a high-waisted look and I thought dressed them up more. I think with other modifications,dressed up PJ pants could be equally good for a boy.
Abi was not exactly thrilled with the high waisted look. But I promised her that with a long tunic, it would be just fine. She has just grown accustomed to a mid rise pant and so her first assumption was that I made them wrong.
I did make them a little long though, I wanted there to be room for growth. So many of her pants right now look like she is waiting for a flood, so I am glad that I added that length. Hopefully she can wear these through the winter.
Have you ever dressed up PJ pants?
Saturday, November 29, 2014
Omni Family Tour
Here are the 3 that would fall in the Tween range...and they all love them.
 |
| Size 12, Adult small and 10 |
The Omni is a very quick sew...seriously it is one of those patterns that takes longer to tape and cut out than to actually sew. The other great thing about it is the size range...12 months to XXXL. You can't beat that?


Sophia got a shawl collar with the kangaroo pocket, cuffs and waist band.
Good: The instructions were great and easy to follow. The many options and sizes available. The simplicity of what is needed (just fabric!). The wear-ability and comfort of the finished product. There are lots of good things with this pattern.
Good: The instructions were great and easy to follow. The many options and sizes available. The simplicity of what is needed (just fabric!). The wear-ability and comfort of the finished product. There are lots of good things with this pattern.

For the 2 adult versions I added the hood option instead. Just be forewarned, it takes a lot of fabric to get the hood...don't skimp on that part of it.
Bad: I would say the only bad thing is that it seems to run a little small (or maybe we just ate too much on Thanksgiving...these pictures were taken the day after because of bad weather the day before Thanksgiving). If you want it for layering/wearing something underneath, I would go up a size than the one listed for your measurements. My kids like to wear sweatshirts like coats almost (something they might have to change now that we don't live in the warmer South), so they like to layer them and take them off in the warmer classrooms at school...Ethan especially would have liked his a little roomier.
Ugly: Nothing at all.

I give this pattern 5 LIGHTENING BOLTS, because it really is a great pattern.
Disclaimer: This pattern was given to me as part of the tour, but all opinions are my own. I really do think it is a great pattern and wore mine out shopping all day today.
Now go check out the other stops on the tour and try your hand at the awesome prize packages!
Disclaimer: This pattern was given to me as part of the tour, but all opinions are my own. I really do think it is a great pattern and wore mine out shopping all day today.
Prize Pack #1
1.5 meters of fabric from Joy Fits Fabrics
Omni Tempore Pattern Bundle by Sofilantjes
Bustle Skirt Pattern by Koda Baby Boutique
1 Pattern of choice by Filles a Maman
1 Pattern of choice by Serger Pepper
1 Pattern of choice by E+M Patterns
1 Pattern of choice by Striped Swallow Designs
Prize Pack #2
1.5 meters of fabric from Joy Fits Fabrics
Omni Tempore Pattern Bundle by Sofilantjes
Grace Pattern by Rose & Lee Designs
1 Pattern of choice by Filles a Maman
1 Pattern of choice by Madeit Patterns
1 Pattern of choice by Dandelions n' Dungarees
1 pattern of choice by FABulous Home Sewn
Monday, November 24th
Tuesday, November 25th
Wednesday, November 26th
Thursday, November 27th
Friday, November 28th
Saturday, November 29th

Wednesday, November 26, 2014
Any one for Finnish clothing? Intro to Ottobre magazine
There is a Finish (from Finland) sewing pattern magazine that has the most amazing and professional looking clothing. It is called Ottobre Design. The magazine does come in an english language version and it contains patterns from infant to tween sizes. The tween patterns are very stylish and have a very European vibe; which is not surprising since it is a European pattern magazine.
Some of our favorite bloggers that sew for tweens use Ottobre patterns. Such as Sabrina from Sew a Straight Line. She recently reviewed an OTTOBRE moto jacket pattern for us HERE.
The Autumn 2014 issue has some great looking patterns for tweens.
Something to be aware of when buying an Ottobre magazine is that instructions are minimal. I would say the patterns are for a beginner who is familiar with sewing vocabulary and is ready to push herself to the next level. Intermediate and higher sewers will find the professional techniques to be quite efficient.
Especially if you are sewing for a tween boy, this is a magazine for you! There are wonderfully cool boy clothes and it is fun to see how they are styled in the magazine.
I have a couple issues from 2007 and I still use them. The patterns come in a large sheet with each outfit drawn out in a separate color. This can be intimidating because you have to first find you pieces in the jumble of line drawings and then you must trace each one out. I find that a cheap sewable interfacing works perfect because it stays still as I trace and I can easily see through it.
NOTE: There is no seam allowances on these patterns! You just add the allowance you want to the pattern. I usually go with a 1/4 inch.
Also, the interfacing is durable and with these great patterns, you will use them many times.
Some of our favorite bloggers that sew for tweens use Ottobre patterns. Such as Sabrina from Sew a Straight Line. She recently reviewed an OTTOBRE moto jacket pattern for us HERE.
The Autumn 2014 issue has some great looking patterns for tweens.
 |
| Ottobre Design |
 |
| from the Supermodels and Hipsters line of the 3/2014 issue |
Especially if you are sewing for a tween boy, this is a magazine for you! There are wonderfully cool boy clothes and it is fun to see how they are styled in the magazine.
 |
| 3/2014 Issue |
 |
| 4/2014 Issue |
NOTE: There is no seam allowances on these patterns! You just add the allowance you want to the pattern. I usually go with a 1/4 inch.
Also, the interfacing is durable and with these great patterns, you will use them many times.
Have you ever sewn an Ottobre pattern? What did you think?
Monday, November 24, 2014
Around the World Blog Hop
Sally here in this stop of the Around the World Blog Hop at Sew Cool for the Tween Scene, where we blog/sew with tweens (9-13 year olds) in mind. Thanks Melanie of Filles a Maman for letting me participate. This stop is at the blog that I co-author with another mom, Major Mama, who happens to live across the country, making this a double stop I guess. I also have a personal blog over at Daisy Chain Creations where I keep track of all of my creations, not just my tween centered ones.
What am I working on?
Recently I was the lucky winner of an Abilmente prize package over at Naeh-Connection.
 |
| Just some of the fabric I won...it felt like Christmas, seriously |
I think I have now doubled my pdf sewing pattern list thanks to that prize package. My projects right now (I usually have more than one going at a time) seem to either involve one of those patterns or the fabrics that I received. I have several patterns to assemble and cut out, a couple of shirts cut out that I need to sew up and a pile of fabric just waiting to be turned into stuff.
I'm also in the Christmas mindset and am thinking of what I need to make; from pajamas to ornaments...


each of my kids gets at least one thing created by me each year and I always try to keep it from being a last minute thing.

How does my work differ from others?
My work specifically for Sew Cool for the Tween Scene is different in that we are focused on finding patterns and fashion ideas that work for the crazy Tween years of 9-13. Both Major Mama and I have girls in that age range and were kind of underwhelmed when it came to pattern selections for that age range, as well as being a little appalled at the retail world's offerings. Either they were still little girl-ish or too adult looking. We've made it our mission track down patterns that allow them to dress a little more maturely but at the same time remain modest and age appropriate. Just in the last year it's been fun to see many pattern creators expanding their size ranges and to be creating some stylish designs that work for this age group. You can read more about it here.

Why do I create what I do?
I create because I can, because I need an outlet that allows me to have immediate (compared to motherhood) results and because creativity is a stress reliever. A favorite quote of mine goes "The desire to create is one of the deepest yearnings of the human soul." and sewing helps me with that desire.
 |
| Thought I'd share a picture of the other gal I create for. |
How does my creating process work?
It usually starts with a need or a bit of inspiration of fabric or pattern that catches my eye. Or when one of my girls says they would like something, I usually try to create it for them...within reason of course. I love it when they come to me and say "I need a black skirt for my upcoming band concert." or "Could you make me a poodle skirt for our themed Read-a-Thon?" It gives me a chance to think it through and make something that is not only needed but personally made for them. I love it!
For the non-sewing/creating part of blogging, the writing, I love coming up with our posts that follow trends and current fashion. I have fun pursing the internet for inspiration and seeing the beautiful creations of others.
Now to pass the baton on to someone else...check out Stacy at The Land of KA! She creates such stylish clothing for her kids and for herself!
Monday, November 17, 2014
Pattern Review: Ready to Go biker jacket
Today we have Sabra from Sew a Straight Line sharing an amazing boy project. Who says you cannot sew cool things for boys???? She shared this jacket on Project Run and Play and I (Major Moma) just knew we had to have her share it here too.
***
Hi, I’m Sabra from Sew a Straight Line and I’m here to talk about the Ready to Go denim biker jacket by Ottobre Design. The jacket pattern is found in issue 4/2014, pattern #40.

This pattern is for older kids, perfect for tweens, with a size range of 134-170 cm. All of Ottobre patterns, a Finish pattern magazine, come in metric European sizing, which goes off the height of the child. This took me some getting used to, when I first started sewing Ottobre patterns two years ago. Now, I prefer it. It is much more accurate and consistent than traditional US sizing. It also means that I keep accurate measurements of my children up to date. In my experience, 134cm is about a child’s size 7/8 in US sizing, with 170 being about a 16/18. I sewed the biker jacket in a 152 for my 11 year old, who wears a child large or 12 in ready to wear. The finished jacket fits him well. It’s not super fitted on him, so he can layer clothing under it and use it as a functional jacket. I’m very happy with the fit, and so is he.

Sewing a jacket can be expensive, and the Ready to Go requires quite a bit of hardware. It needs the heavy-duty separating zipper for the front, plus four additional zippers for pockets and cuff details. I wanted to keep things consistent, and durable, so went with metal outer-wear zippers for all five. In addition to the zippers, the jacket uses 10 heavy-duty snaps as functioning closures and additional details.

I was able to purchase all of my hardware at a big-box fabric store, using coupons. Going the route I did, I probably spent close to $20 in just hardware. You could likely use cheaper materials, but it might compromise the look and/or the durability of the finished jacket.

The pattern calls for denim for the outer shell of the jacket. I used outdoor canvas. I had it on-hand, and after spending so much on hardware, thought I should try to save some money on fabric. Plus, it was the exact color I wanted. The canvas I used was intended for outdoor furniture and had been treated with waterproofing. I thought this would be perfect for a jacket, and it has worked well. Water beads on the jacket. If using denim or other canvas, I’d look into waxing the material to make the jacket most-weather appropriate. Plus, waxing just looks so cool!
For the lining, used a shiny synthetic that was in my stash. I’m sorry, I don’t know what it is exactly. It has no stretch, and is fairly thin.

It worked quite well as lining. The pattern also calls for a small amount of cotton for the pocket bags. I just used the same fabric for the pockets as I did for the lining.

This was a pretty intense sew. There are 14 pattern pieces, ending with a total of 42 cut pieces to sew together! Plus, interfacing,the three zippers, and finishing with the 10 snaps. Tons of topstitching, a full lining, and some new-to-me techniques made this a lengthy, and challenging project. But I did enjoy it quite a bit, too. I’d say this jacket is, at least, a Confident Intermediate sew. Most of the sewing isn’t difficult, but there is a lot of it.
The hardest part, for me, was attaching the lined cuffs to the lined sleeve. I couldn’t figure it out by reading the instructions. Ottobre is great with instructions, and very thorough, but they do not include illustrations of the process, usually. The attaching of the cuffs was near the end of the marathon sewing of the jacket, and my brain just couldn’t process how to get things sewn together without exposed seams. So I fudged and just sewed right sides together, leaving exposed seams at the top of the cuffs on the inside.

I’m okay with it. You can't tell from the outside at all, even when zipped fully open.

But now that I have stepped back from the jacket, and it’s been a few weeks, I *think* I understand what Ottobre wanted me to do to keep things finished inside and out. I’d recommend breaking the sewing of the jacket into a few days, and not trying to do it all in an afternoon like I did!
I also messed up at the hem in a couple of different ways. I didn't keep things neat and pretty on the inside when attaching the waistband. No excuse for this, really. I was just tired and wanted to finish, so sped through a step that I should have taken my time on; pinning, smoothing, and otherwise making sure things were done properly.

My other mistake was that, when I went to attach the waistband, couldn't understand why it was so long. I had an extra few inches at the one end, hanging off the edge of the jacket. I assumed I'd cut wrong, and lopped those extra inches right off. If I had been smart, I would have consulted the line drawings of the pattern and seen that the waistband does, in fact, extend off the left side, crossing over onto the right, as a style effect. I didn't discover my mistake until I went to install my snaps at the very end and realized I had lost that really cool bottom look. Don’t lop off anything before double checking with the pattern!

You can also see, from these pictures, that my stitching isn't great. I ran out of topstitching thread part way through, but was in too much of a rush to go buy more. So I tried, for a while, to do double stitching with regular thread. But that got tedious and looked messy. So then I just finished things with regular thread, which didn't sew very smoothly through the thick layers of canvas.
Overall, the jacket is great. I’m very happy with the end product, lopped off waistband and all. It looks cool, fits well, and does not look homemade (unless you look closely at the ugly stitching in places). The details in the jacket are fabulous, and so authentic. The shoulders are padded and quilted,

There is a hanging tab inside the collar of the neck, elbow darts, and then all that piecing and topstitching. Real deal, so cool!
I can't think of one thing I would change on this pattern. The only issues I had, were ones where I made a mistake in spite of the instructions and the pattern. The fit is great, it looks amazing, totally professional details and finishing, and you get exactly what you expect to get going in. This is definitely not a pattern to rush into or through, and not for anyone new to sewing. But if you have the patience, the time, and a good understanding of garment construction and techniques, I absolutely recommend the Ready to Go jacket.

I give it a full five bolts, for yielding a jacket just like the pictures promise, for walking you through all the steps (even those I tripped up on), a great size range with a fabulous fit, and for including so many professional details. Like, all the details. You can see more pictures of the jacket, and the rest of the outfit I made to go with it using two other Ottobre patterns, on my blog, Sew a Straight Line
Monday, November 10, 2014
Pattern Review: Etage Dress and Top
We recently were connected by a reader, the lovely Joan, she wanted to share a new pattern that she has sewn for her grandchildren and neighbor kids. So of course we asked her if she would be willing to do a reveiw so everyone can see this pattern. And she kindly complied.
Here is her review of the Etage Dress and top by Sew Straight and Gather.
Pattern Source: Sew Straight Patterns at sewstraightandgather.com
Sizes available: 12 months to 12 years

Special materials required: You need knit fabric, in one or several colours. T-shirt knits are the easiest to work with, and lighter weight is better.
Skill level required: Advanced Beginner. You will need a bit of experience sewing with knits, but there are no buttons zippers or anything complicated. The actual sewing is easy, but because the Etage is asymmetrical, you need to keep your wits about you when cutting and assembling. However, there is a great series of picture to walk you through this.
How you came to choose the pattern: I was part of the original tester group. The designer Terri worked really hard at that, putting us through several different versions until she had it perfect. The instructions and the sizing for the Etage are perfect!

Did you deviate from the pattern? If yes, how? The two in my pictures are standard size 9 and 11. I just added leggings to match with the Top version to make it a complete outfit.
Good:
Sizes: This pattern comes in a huge range of sizes, and seem to please every girl. My nine and twelve year old neighbours loved theirs, my 4 year old granddaughter has 3 now, and I have two more on the cutting table for my 11 and 13 year old granddaughters. Our tester group had girls of every age, and it looked great on all of them.

Style: The Etage is twirly, and unique in its look and construction. There is a top version with three layers and a dress version with four, along with several different sleeve lengths and a sleeveless version. You can use one fabric for the whole thing, or combine several different ones as you wish. You can use a regular hem, a rolled hem, or a lettuce edge for various looks. Check out the different versions on the website for inspiration. The end result can be anything from cute and playful if you make it in several prints, to super- sophisticated – check out the all black version on the website.
.JPG)
The Pattern: You can print the whole pattern, or just the size you need. The instructions are excellent and there are very clear pictures to walk you right through the process.
Bad: Pattern assembly takes a while, and you need to pay close attention when you are cutting it out. Terri has provided wonderful diagrams to make the pattern assembly easy, and the patterns are well marked to keep cutting clear. It’s not difficult, just time consuming. And the sewing itself is quick and easy.
My hints to make this process go smoothly:
1. Unless you know for sure you will only make size 12, avoid the temptation to print just one size and assemble the whole thing and trace the size you need on tissue paper. That gets most of the work done up front.
2. Put a sticky note with the name of each piece on the cut out fabric. This is especially true if your fabric looks the same on both sides. Lay it out on the floor beside you, just the way Terri shows you in the diagram, and work your way through following the instructions.
3. If you upcycle some old Tshirts for your first version and use several different colours so you don’t get confused, you‘ll be an expert by the time you move on to your pricier fabric.
Ugly: nothing!

Overall pattern rating: 5 bolts
Wednesday, November 5, 2014
Ansley Top By Blaverry Blog Tour
I'm excited to be a part of this blog tour for a great pattern...that goes up to tween sizes..yea!!! The pattern is the Ansley Twirl Top/Dress by Blaverry Patterns and it has been well received. Sophia styled this one a little bit country chic and I like the look. There are just so many possibilities with this great pattern!

The pattern is available in the Etsy shop of Blaverry and it goes up to size 14. And get this...there are a ton of options: 2 dress, 2 top, 6 sleeve, 3 collar, 3 hem. You can do the math, but that means a lot of different styles (I'll be sharing another one over at Daisy Chain Creations in a couple of days). Needless to say, this pattern is a bargain when you think of all of the options. The only thing needed is some woven fabric and a couple of buttons. As for skill level, this would be a good advanced beginner pattern.

I really followed the pattern as is for this top, but added the lace by chopping off most of the short sleeve. The only real deviation I made was to pleat the front instead of gather it...just a little more flattering on a tween, I think. I also added just one button. Since the top is loose enough, I figured Sophia would be wearing something underneath it and liked how my contrasting placket stuck out a little...which I forgot to get a picture of.

The Good--Easy to follow directions, layered pattern options for printing of not only size, but style options as well, easy to sew up and doesn't require too much extra stuff...I had all that I used in my stash. Plus it's a comfortable shirt that could be layered for winter.

The Bad--The directions are a little more minimal than a lot of the pdfs out there. They are more in line with the standard printed patterns...no hand holding and example pictures for every single step. That's why I said advanced beginner for skill level...there is an assumption of sewing knowledge behind some of the steps. That's not really a bad thing, but something to be aware of. Also, Sophia was hoping the top would be more tunic like...so next time I'll make it a little longer.

The Ugly--Really nothing...

I give this pattern 4 bolts.
As for the look...I think I like the country look on my girl.

So if you are looking for a great pattern...go check out the Ansley Top/Dress and don't forget to use the discount code. Then go check out the other versions that these amazing ladies are coming up with!
Disclaimer--I received this pattern was given to me for free as part of the tour, but all opinions are my own.
November 3rd
November 4th
November 5th
November 6th
November 7th
Subscribe to:
Posts (Atom)